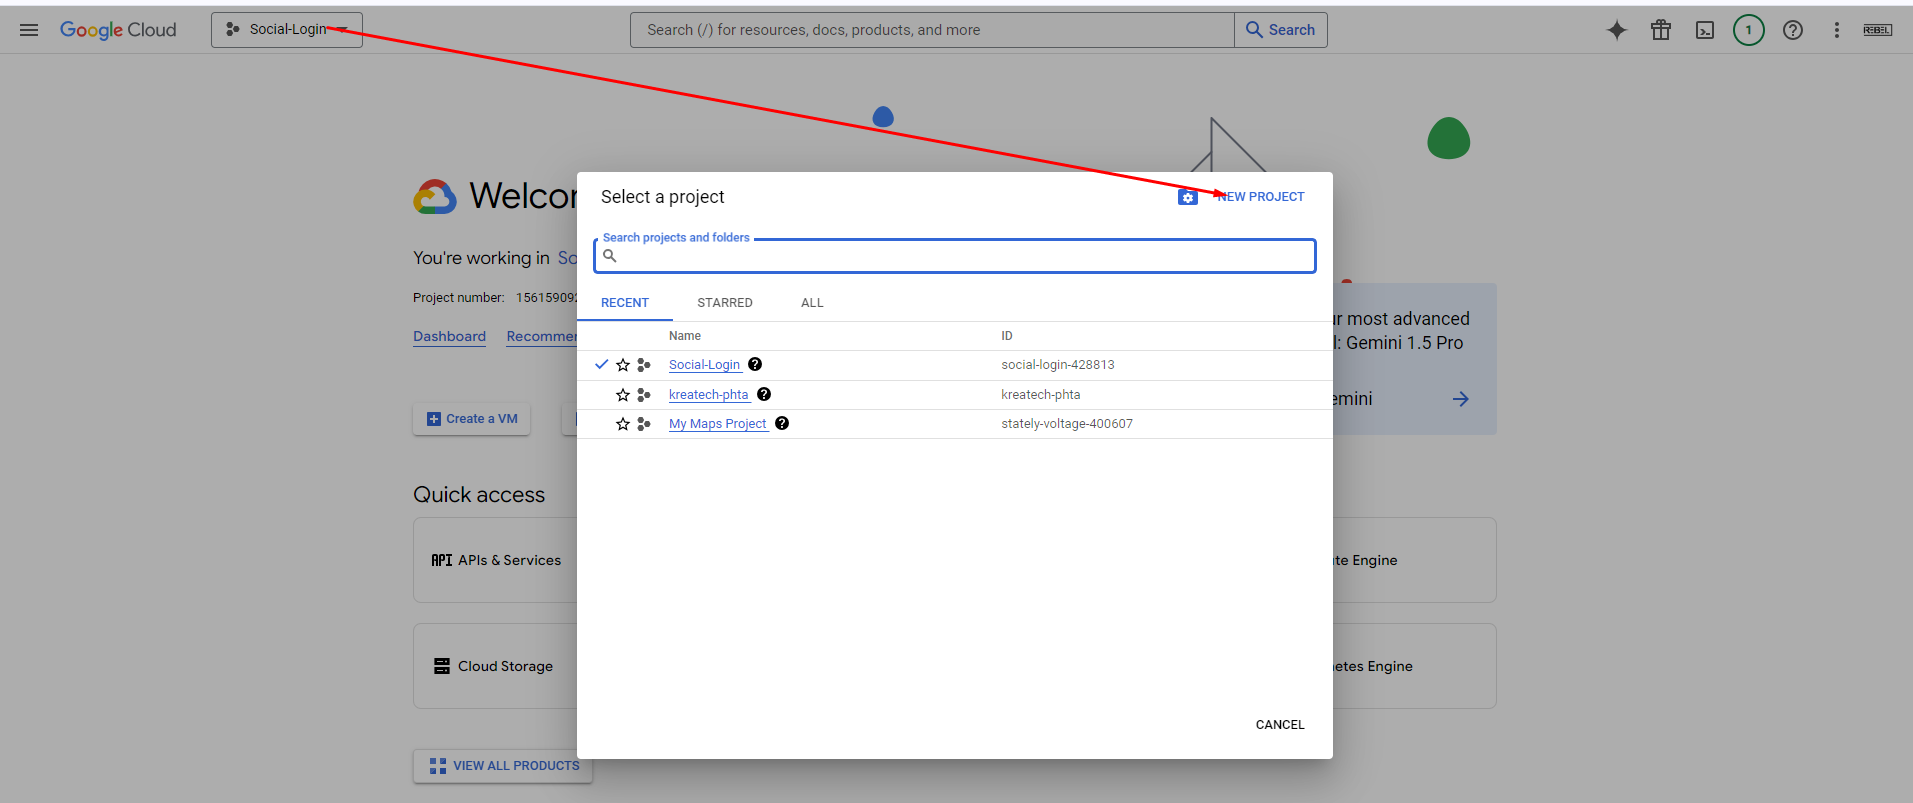
Step 1: Set up a Google Cloud Project and Enable the Drive API
- Go to the Google Cloud Console
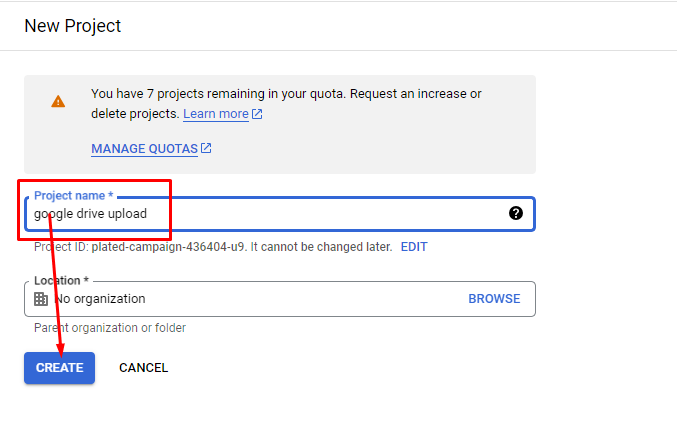
- Create a new project (or select an existing one).
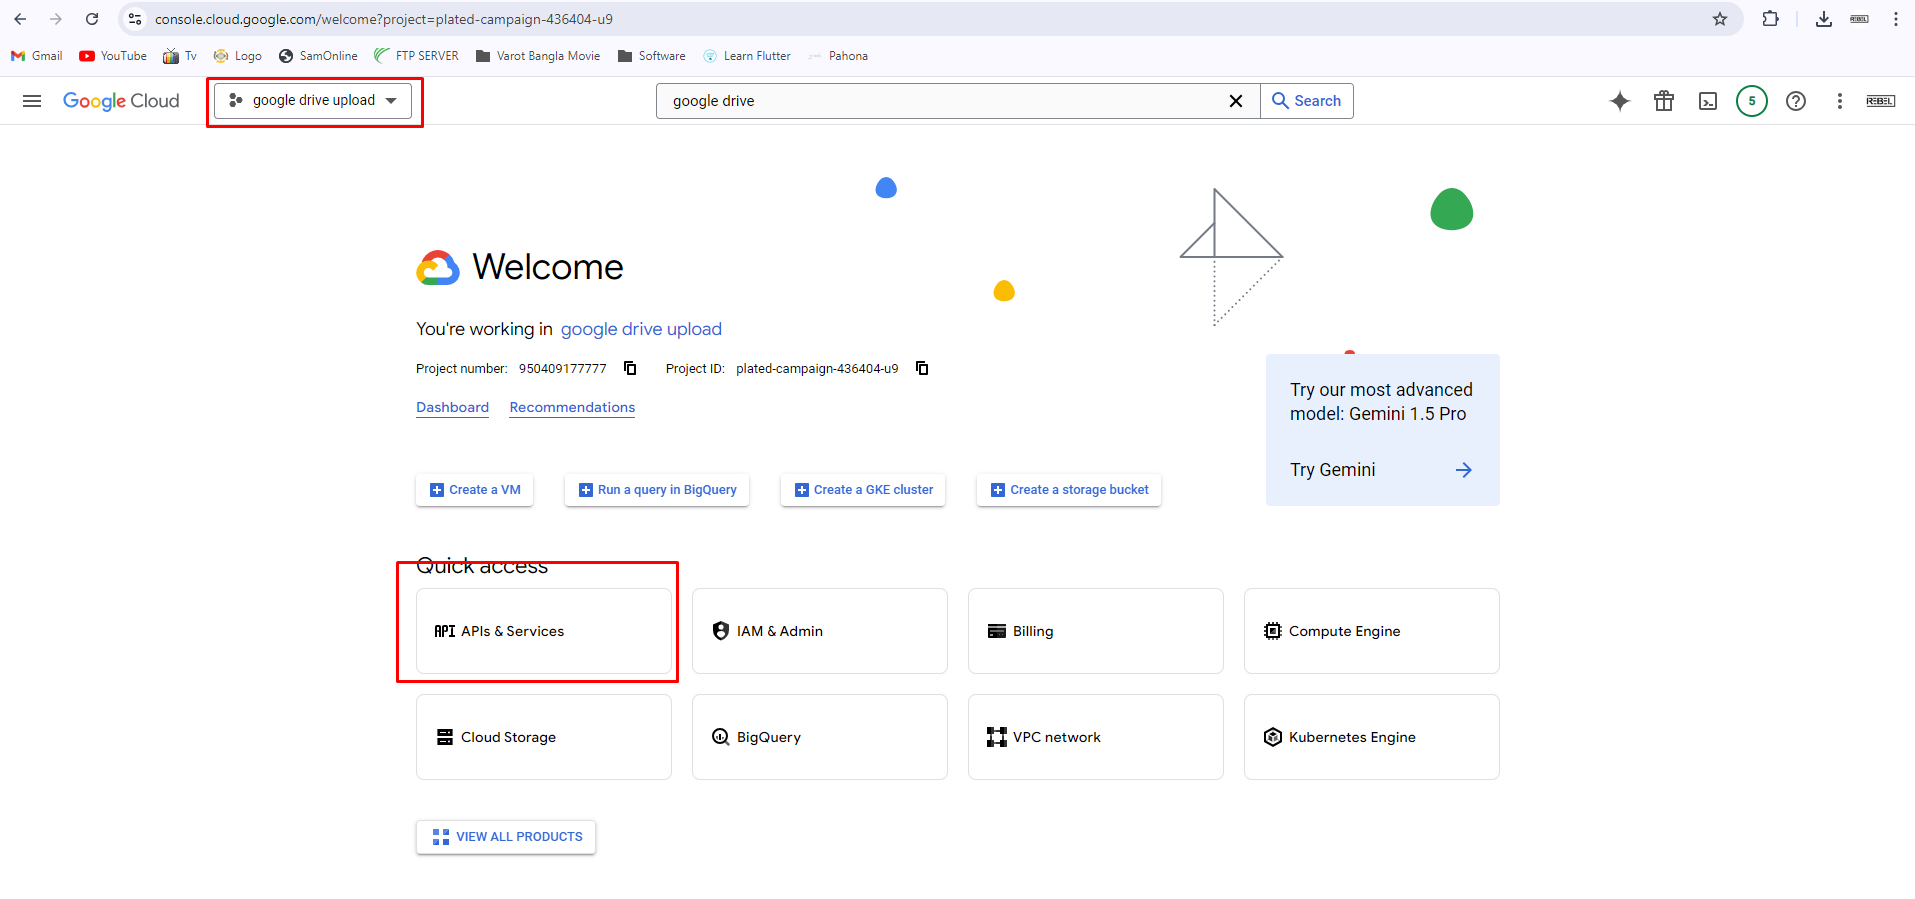
- Enable the Google Drive API:
- Go to “API & Services” > “Library”
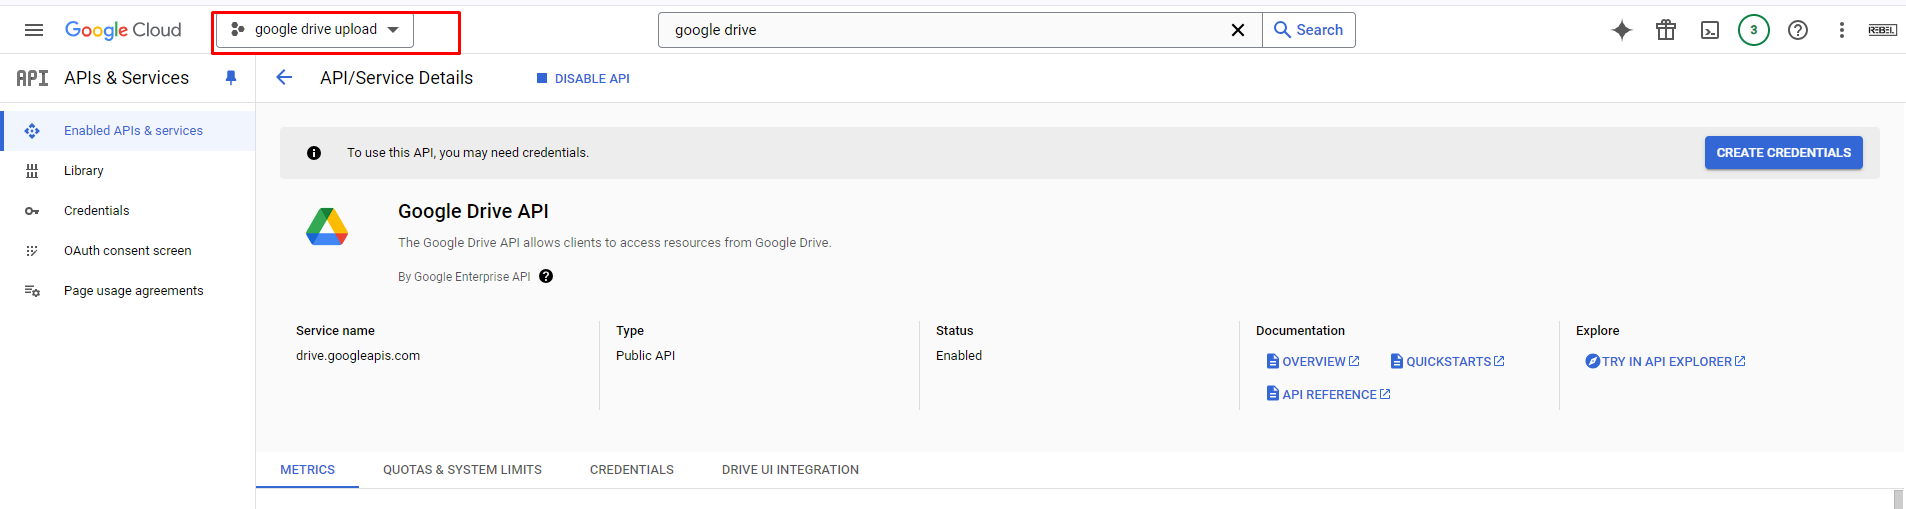
- Search for Google Drive API and enable it.
click enable button
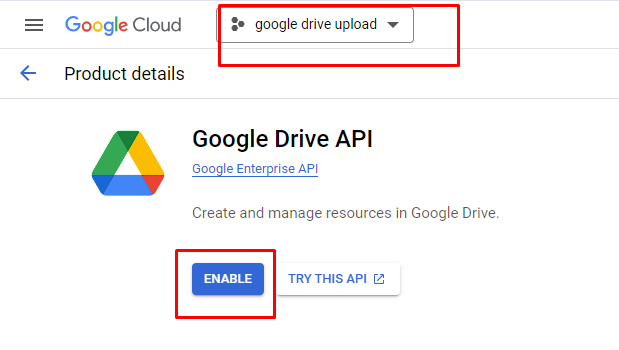
it show like below
Step 2 : Create OAuth 2.0 credentials:
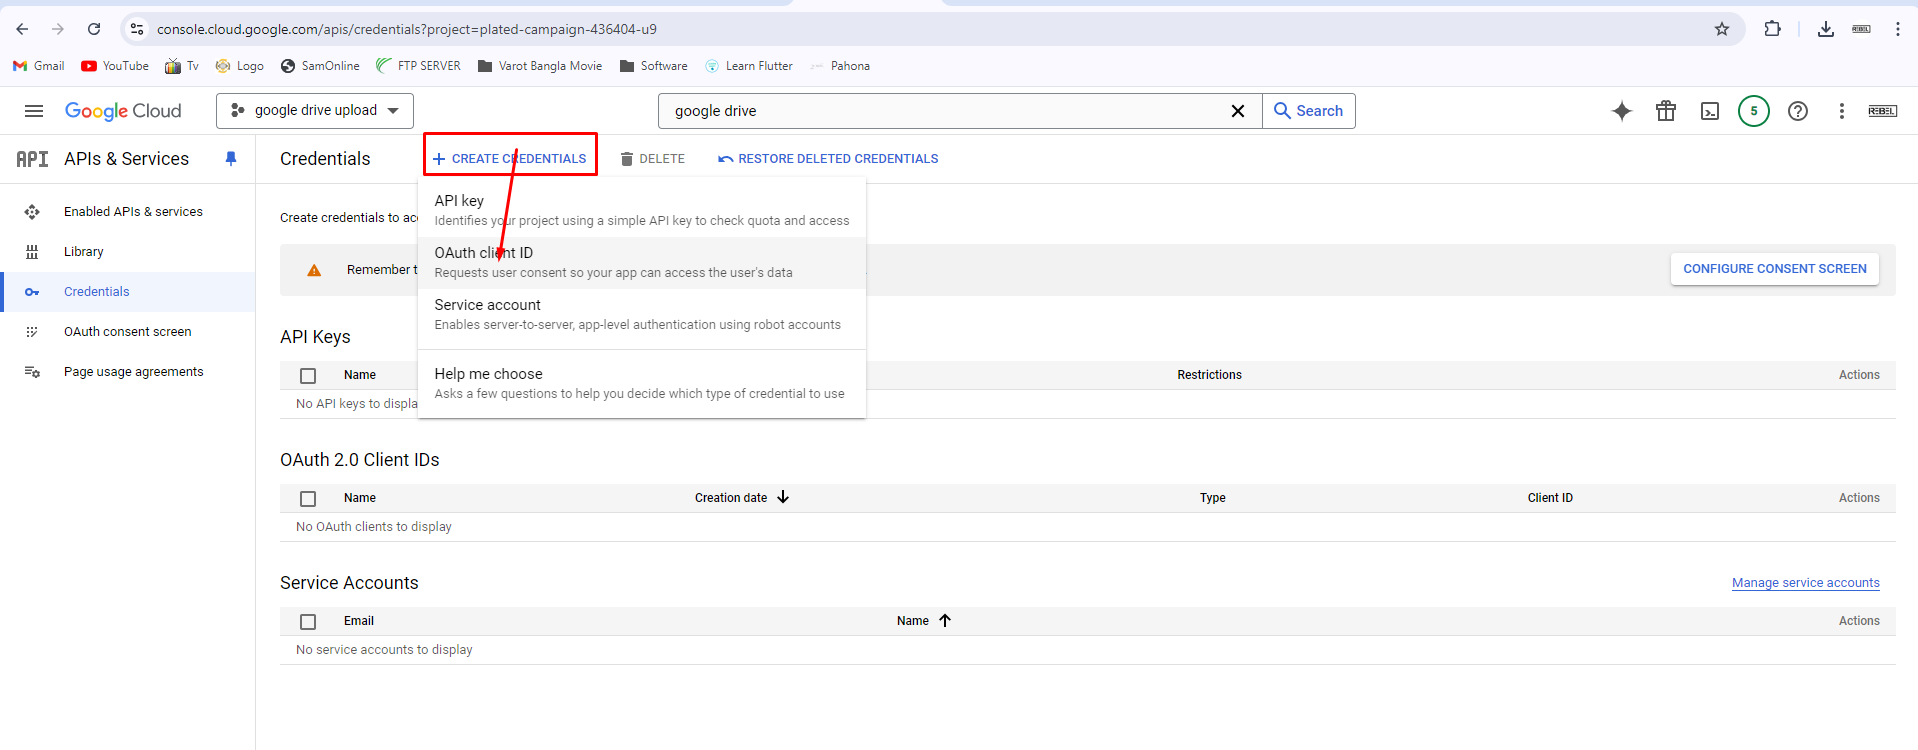
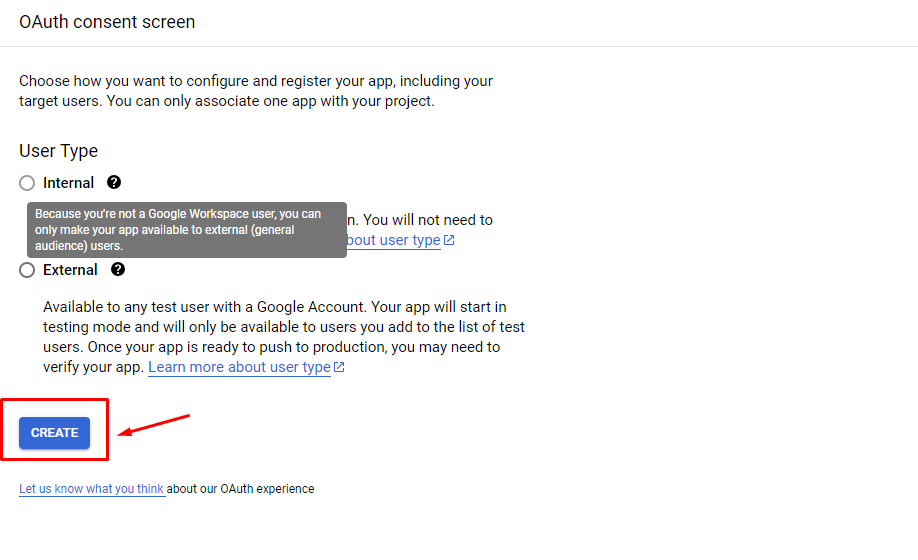
it’s not possible to create an OAuth client ID without first setting up the OAuth Consent Screen in the Google Cloud Console so first create OAuth Consent Screen then step to Select “Web application”
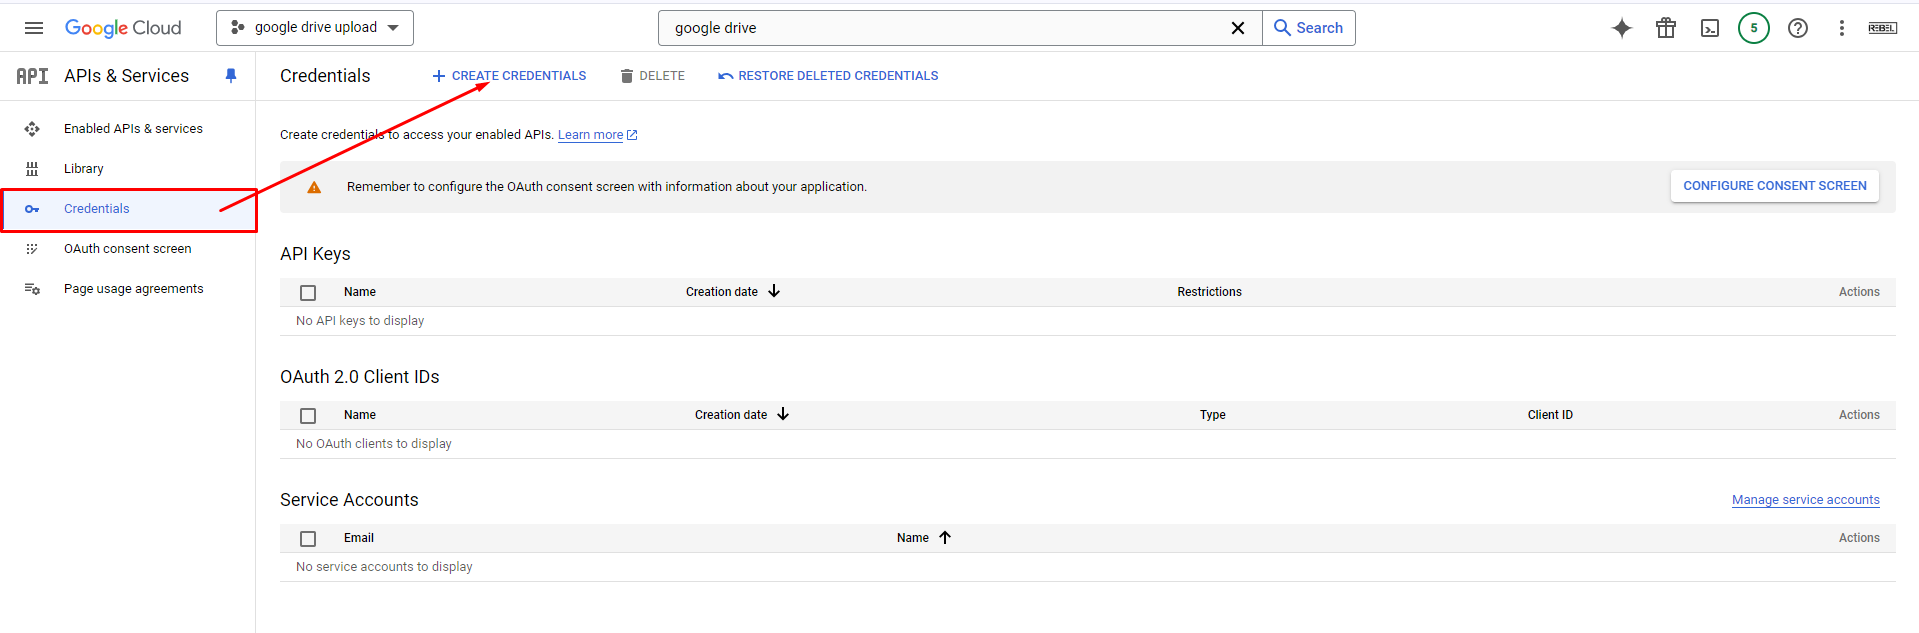
- Create OAuth 2.0 credentials:
- Go to “APIs & Services” > “Credentials”
- Click “Create Credentials” and select “OAuth 2.0 Client ID”

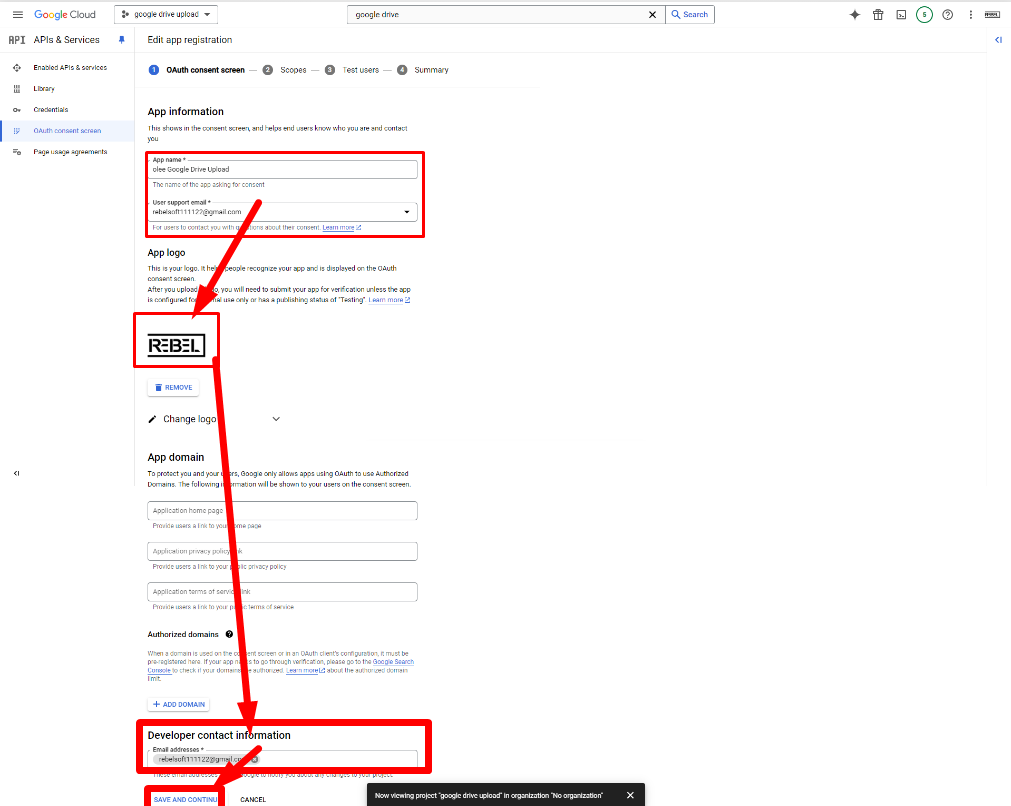
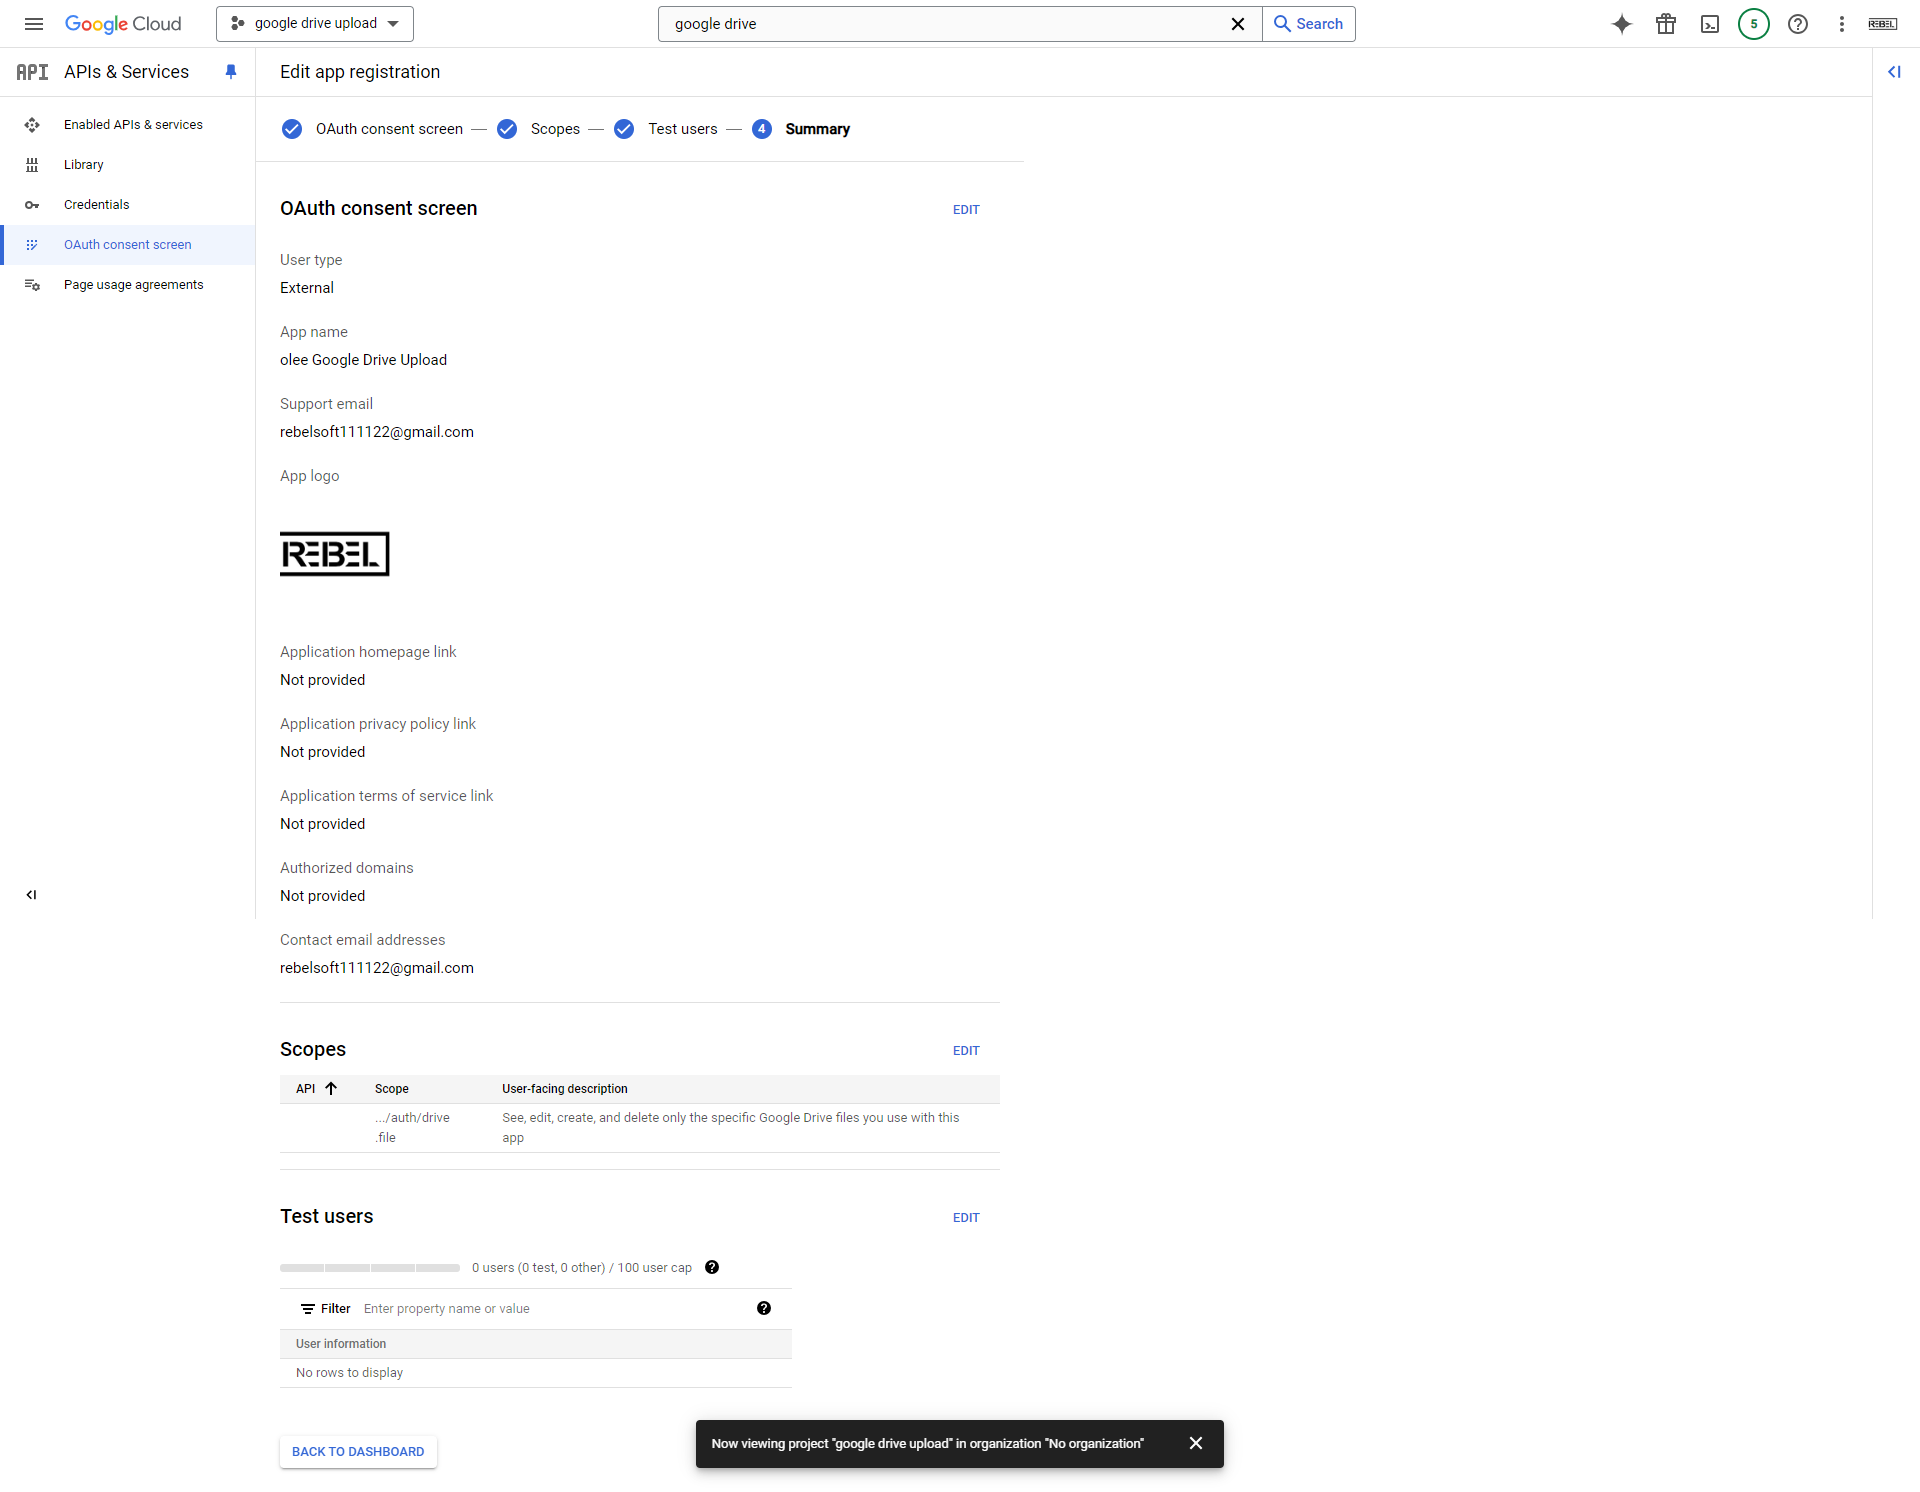
Summary of What to Fill:
- App name: olee
Google Drive Upload - User support email:
rebelsoft111122@gmail.com - App logo: Upload a logo if you have one (optional).
- Application home page:
https://yourwebsite.com(optional for testing). - Application privacy policy link:
https://yourwebsite.com/privacy-policy(optional for testing). - Application terms of service link:
https://yourwebsite.com/terms-of-service(optional for testing). - Authorized domains: Add your domain if your app is public (optional for testing).
- Developer contact information:
rebelsoft111122@gmail.com(or your preferred email).
After filling out these details, click Save and Continue to move to the next sections.
Next Steps:
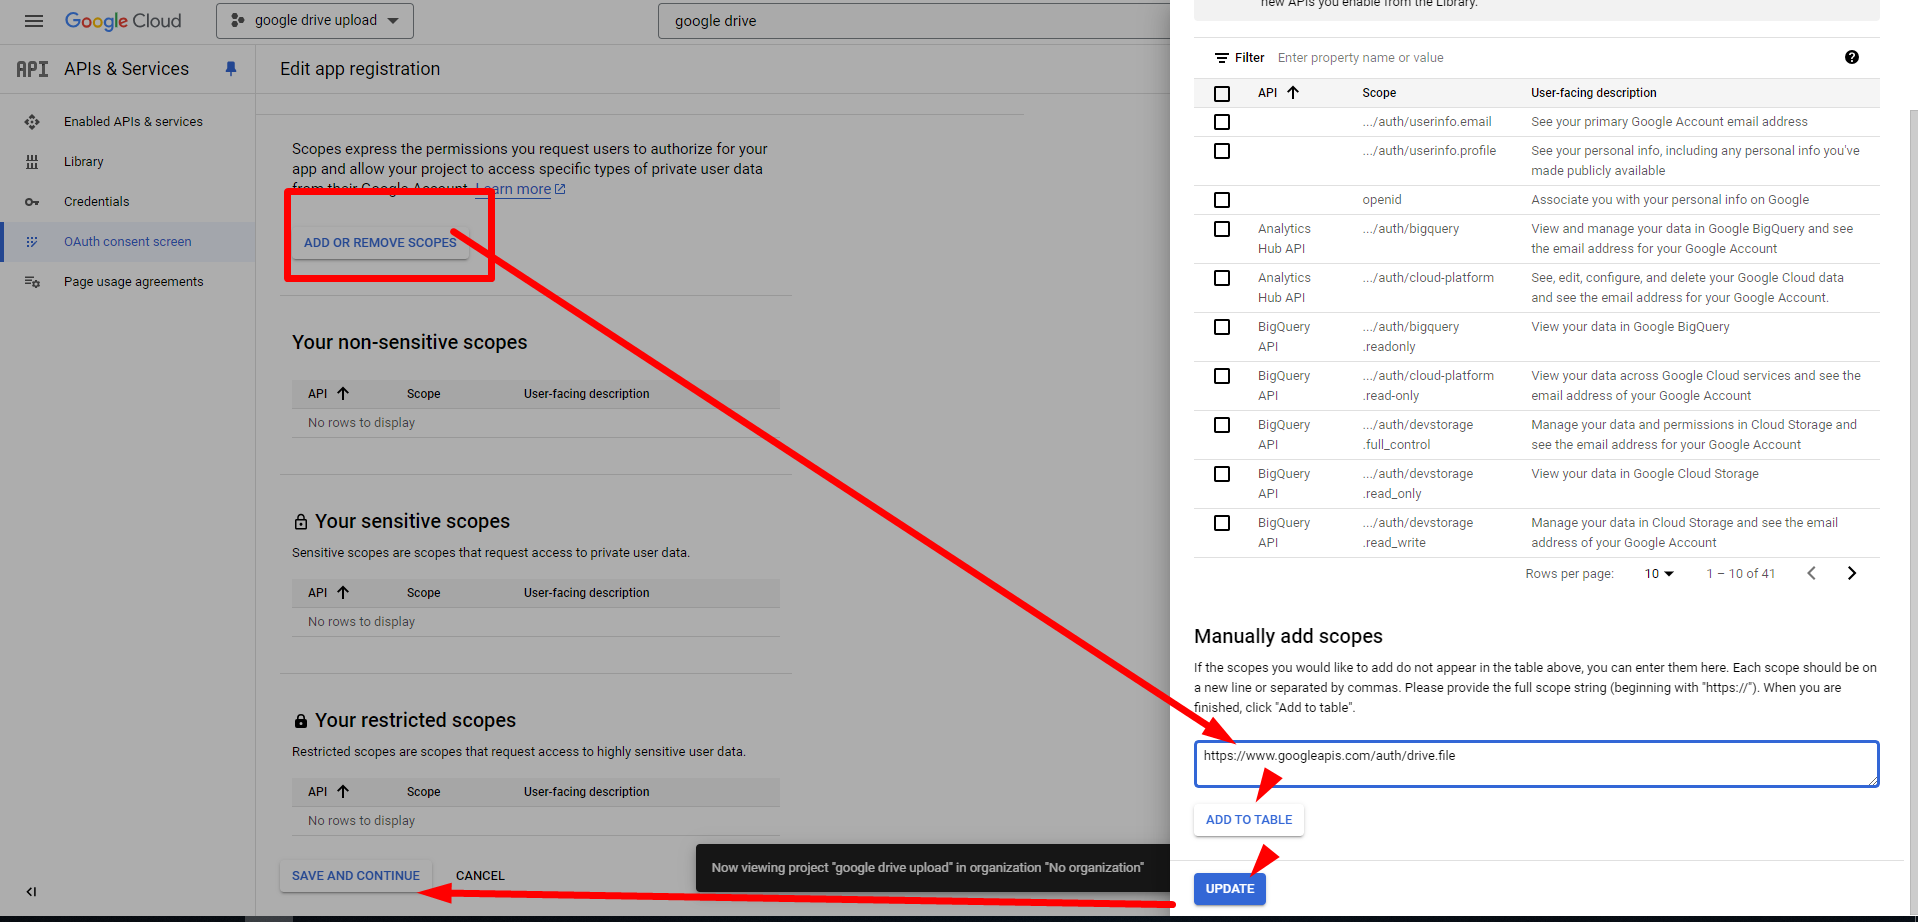
- Scopes: Define the permissions (scopes) that your app will request from users. You’ll need to add
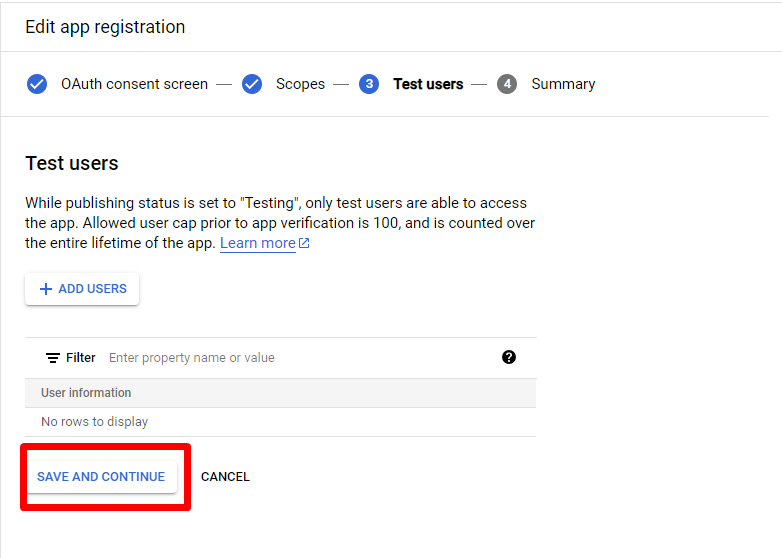
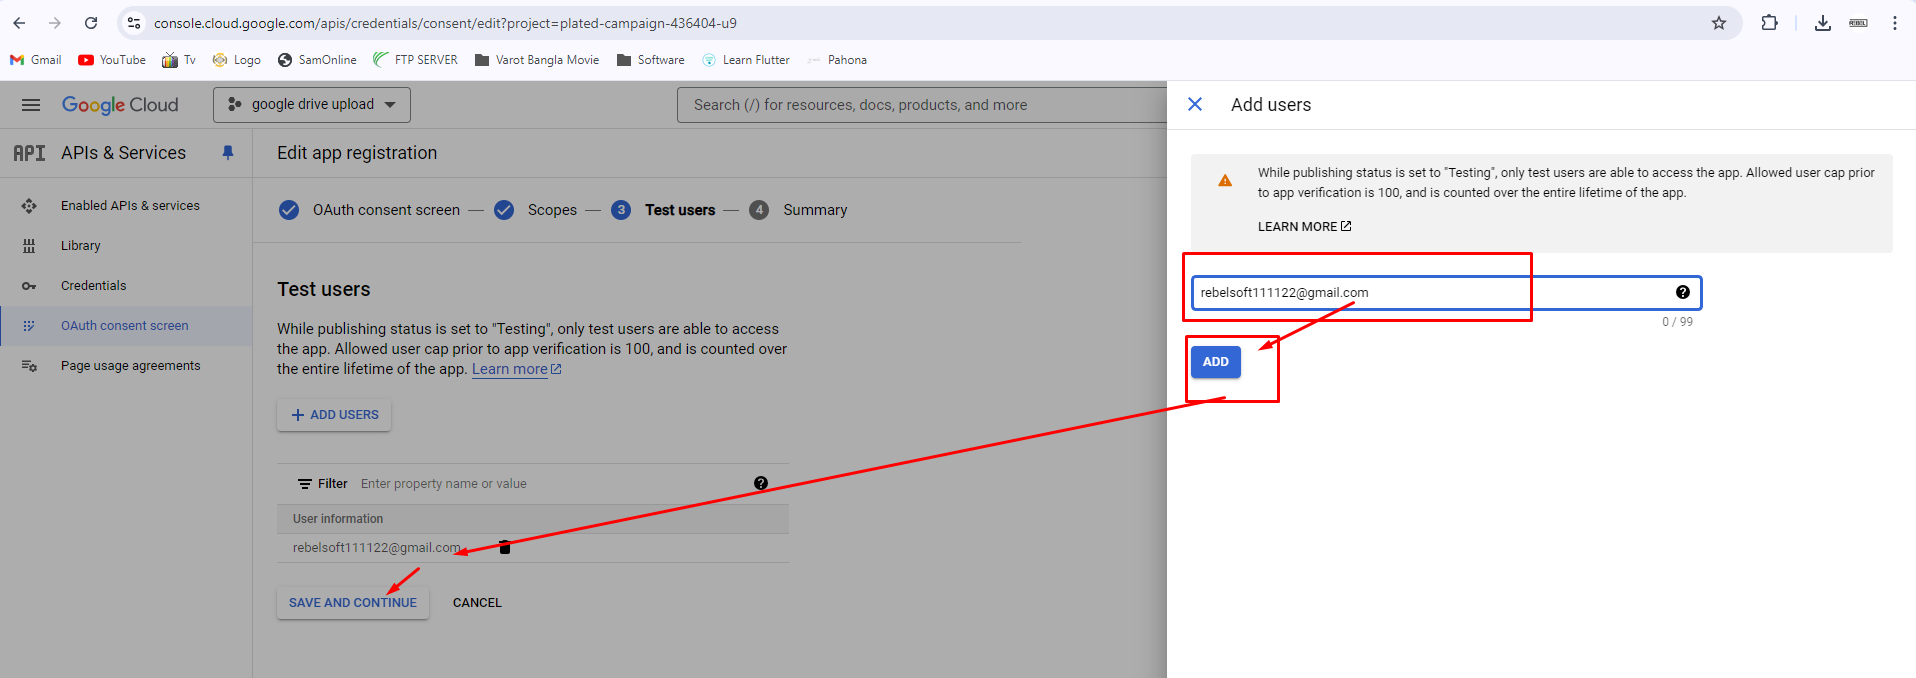
https://www.googleapis.com/auth/drive.fileto upload files to Google Drive. - Test Users: For testing purposes, you can specify email addresses for people who can test your app (including your own email).
- Summary: Review all details and confirm to finish setting up your consent screen.
Once done, your app will be ready for use in testing mode, and you can proceed with implementing the file upload feature in your project.
click back to dashboard
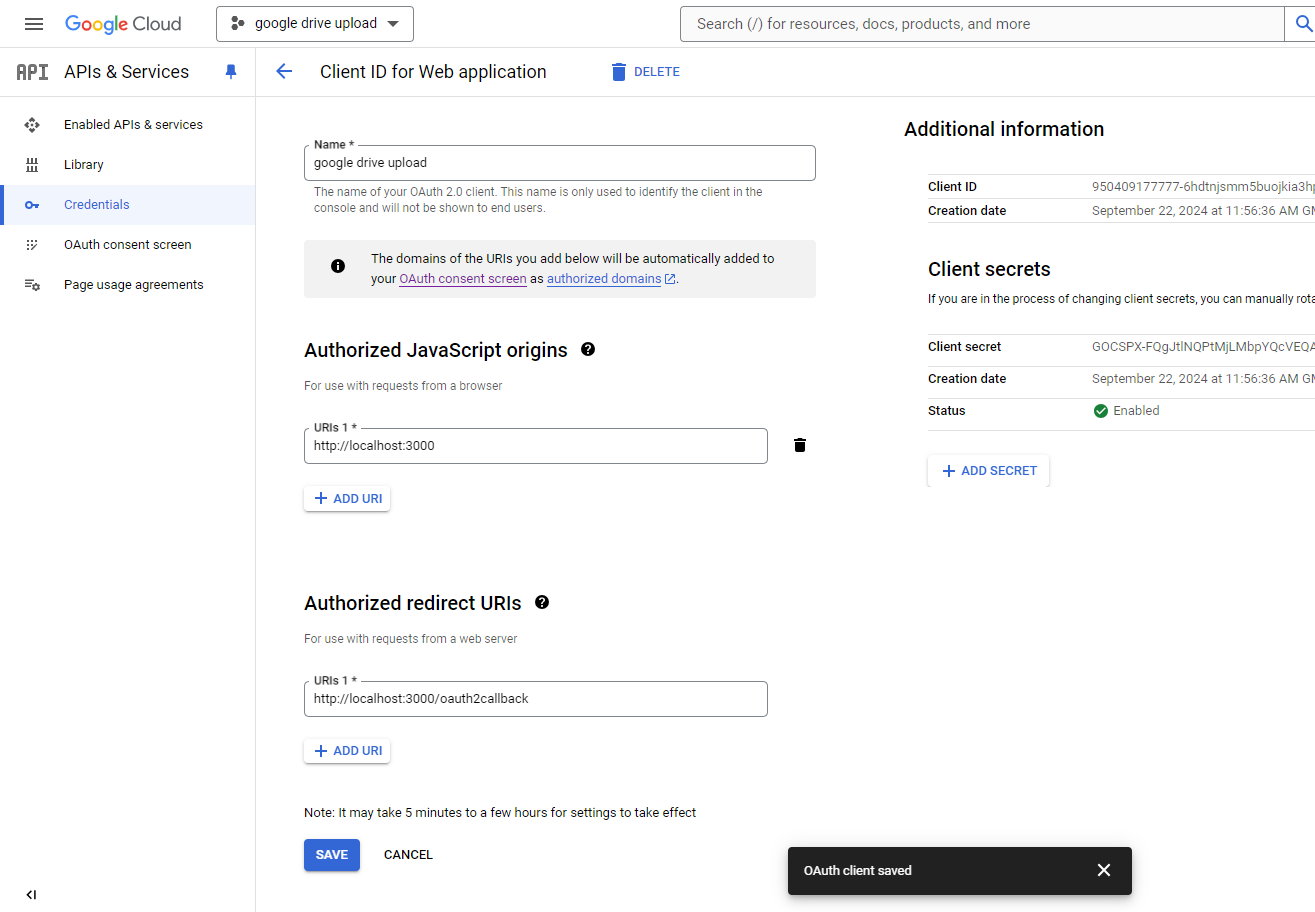
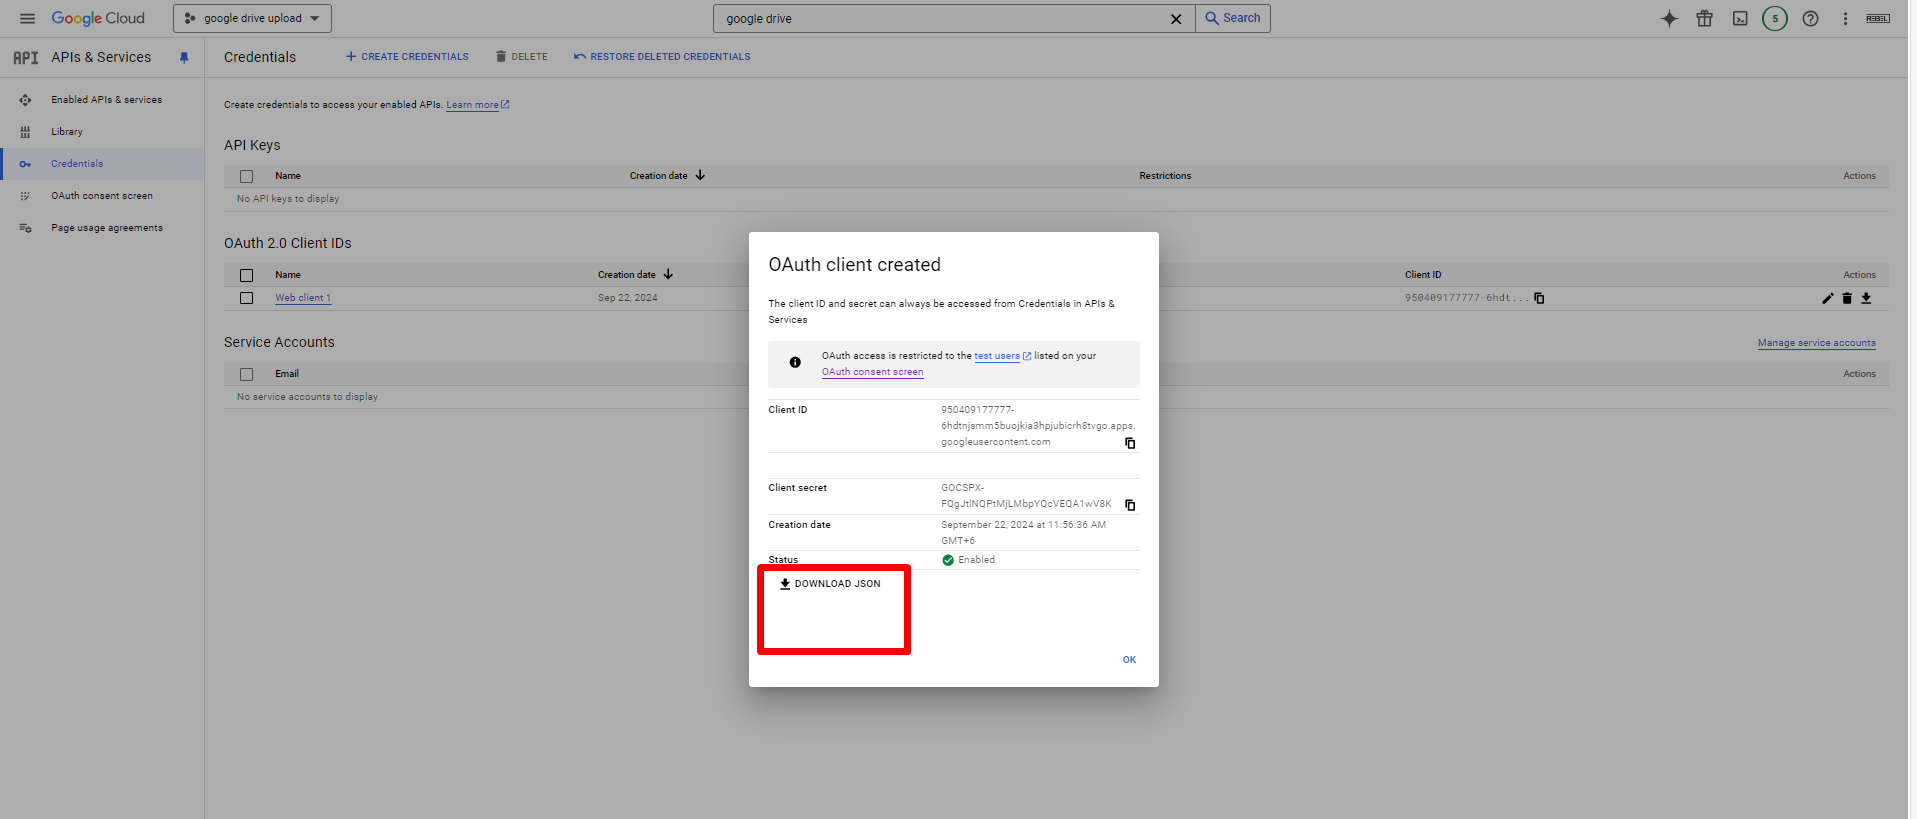
- Select “Web application” and set the redirect URI to
http://localhost:3000/oauth2callback (if you’re running locally). - Download the
credentials.jsonfile and save it in your project directory.
Code Part
Project Structure
Here’s how the project folder will be structured:
google-drive-upload/
├── controllers/
│   └── uploadController.js
├── middleware/
│   └── googleAuth.js
├── routes/
│   └── uploadRoutes.js
├── uploads/
│   └── (optional: for any other files)
├── credentials.json
├── index.js
├── package.json
└── package-lock.json
Step 1: Create the Project Directory
- Create the project folder:
mkdir google-drive-upload
cd google-drive-upload
Step 2: Initialize the Project
- Initialize a new Node.js project:
npm init -yStep 3: Install Required Packages
- Install the required packages:
npm install express multer googleapis dotenvStep 4: Create Basic Express Server
Create a file named index.js in the project root:index.js:
// প্রয়োজনীয় মডিউল আমদানি করা
const express = require('express');
const app = express(); // Express অ্যাপ তৈরি করা
const PORT = 3000; // পোর্ট নম্বর নির্ধারণ করা

// সার্ভার চালু করা
app.listen(PORT, () => {
  console.log(`Server running on http://localhost:${PORT}`);
});
Explanation:
- আমরা
expressমডিউলটি আমদানি করেছি এবং একটি অ্যাপ তৈরি করেছি। - পোর্ট 3000-এ সার্ভারটি চালু করেছি।
- যখন সার্ভারটি সফলভাবে চালু হয়, তখন কনসোলে একটি বার্তা প্রদর্শিত হবে।
Step 7: Create Google Authentication Middleware
- Create a folder named
middlewareand inside it, create a file namedgoogleAuth.js:middleware/googleAuth.js:
Import Required Modules
Explanation:
প্রথমে আমরা googleapis এবং fs মডিউলগুলো আমদানি করছি।
googleapisমডিউলটি ব্যবহার করে আমরা Google API-এর সাথে কাজ করতে পারব।fsমডিউলটি ফাইল সিস্টেমের সাথে কাজ করার জন্য, যেমন credentials.json ফাইল থেকে ডেটা পড়া এবং ফাইল সেভ করা।
// প্রয়োজনীয় মডিউল আমদানি করা
const { google } = require('googleapis');
const fs = require('fs');
Load OAuth Credentials from credentials.json
Explanation:
এখানে আমরা credentials.json ফাইল থেকে ডেটা লোড করছি। এই ফাইলের মধ্যে আমাদের OAuth 2.0 ক্লায়েন্ট আইডি, ক্লায়েন্ট সিক্রেট এবং রিডাইরেক্ট ইউআরআই থাকে, যা আমরা Google-এর সাথে Authentication করতে ব্যবহার করব।
// credentials.json থেকে ক্রেডেনশিয়াল লোড করা
const CREDENTIALS_PATH = './credentials.json';
const credentials = require(CREDENTIALS_PATH);
Extract Client Credentials
Explanation:
এখানে আমরা credentials.json ফাইল থেকে প্রয়োজনীয় ক্লায়েন্ট ডিটেইলসগুলি বের করছি, যেমন client_id, client_secret, এবং redirect_uris। এগুলো OAuth ক্লায়েন্ট সেটআপ করার জন্য ব্যবহৃত হবে।
// OAuth ক্রেডেনশিয়ালস নির্ধারণ করা
const { client_id, client_secret, redirect_uris } = credentials.web;
const CLIENT_ID = client_id;
const CLIENT_SECRET = client_secret;
const REDIRECT_URI = redirect_uris[0];
Configure OAuth2 Client
Explanation:
এখানে আমরা OAuth2 ক্লায়েন্ট তৈরি করছি। Google API-এর সাথে কাজ করার জন্য OAuth2 ক্লায়েন্টটি ব্যবহার করা হয়, যা আপনাকে Google-এর সাথে Authentication করার অনুমতি দেয়।
// OAuth2 ক্লায়েন্ট কনফিগার করা
const oAuth2Client = new google.auth.OAuth2(CLIENT_ID, CLIENT_SECRET, REDIRECT_URI);
Set Refresh Token if Available
Explanation:
যদি রিফ্রেশ টোকেন আগে থেকেই থাকে, তাহলে সেটি oAuth2Client-এ সেট করা হবে, যাতে নতুন টোকেন পাওয়ার জন্য আমাদের আবার লগইন করতে না হয়।
// রিফ্রেশ টোকেন লোড করা যদি উপলব্ধ থাকে
if (credentials.web.refresh_token) {
  oAuth2Client.setCredentials({
    refresh_token: credentials.web.refresh_token
  });
}
Setup Google Drive API
Explanation:
এখানে আমরা Google Drive API সেটআপ করছি। এই API ব্যবহার করে আমরা Google Drive-এ ফাইল আপলোড বা ম্যানেজ করতে পারব।
// Google Drive API সেট আপ করা
const drive = google.drive({
  version: 'v3',
  auth: oAuth2Client
});
Generate OAuth URL
Explanation:
এই ফাংশনটি Google OAuth প্রক্রিয়া শুরু করার জন্য একটি URL তৈরি করে। এই URL-এ গেলে ব্যবহারকারী Google-এর সাথে Authentication করবে এবং আপনার অ্যাপকে অনুমতি দেবে।
// OAuth URL পাওয়ার ফাংশন
const getAuthUrl = () => {
  return oAuth2Client.generateAuthUrl({
    access_type: 'offline', // রিফ্রেশ টোকেন নিশ্চিত করে
    scope: ['https://www.googleapis.com/auth/drive.file'] // Google Drive এর জন্য অনুমতি
  });
};
Handle OAuth Callback
Explanation:
এই ফাংশনটি তখন কল করা হয় যখন ব্যবহারকারী Google-এর মাধ্যমে আপনার অ্যাপের জন্য অনুমতি দেয়। এটি Google থেকে টোকেন সংগ্রহ করে এবং সেই টোকেনকে অ্যাপ্লিকেশনে সংরক্ষণ করে। রিফ্রেশ টোকেন পাওয়া গেলে সেটিকে credentials.json ফাইলে সংরক্ষণ করা হয়, যাতে ভবিষ্যতে রিফ্রেশ করা যায়।
// OAuth Callback হ্যান্ডল করার ফাংশন
const handleAuthCallback = async (code) => {
  const { tokens } = await oAuth2Client.getToken(code); // কোড থেকে টোকেন পাওয়া
  oAuth2Client.setCredentials(tokens); // টোকেন সেট করা

  // টোকেন credentials.json এ সংরক্ষণ করা
  if (tokens.refresh_token) {
    credentials.web.refresh_token = tokens.refresh_token;
    fs.writeFileSync(CREDENTIALS_PATH, JSON.stringify(credentials, null, 2)); // ফাইলে সংরক্ষণ
  }

  return tokens; // টোকেন রিটার্ন করা
};
Export the Functions
Explanation:
অবশেষে, আমরা আমাদের তৈরি করা ফাংশনগুলো এবং oAuth2Client-কে এক্সপোর্ট করছি, যাতে অন্যান্য ফাইলগুলো থেকে সেগুলোকে ব্যবহার করা যায়।
// এক্সপোর্ট করা ফাংশনগুলো
module.exports = { getAuthUrl, handleAuthCallback, oAuth2Client };
Full Code:
// middleware/googleAuth.js
// প্রয়োজনীয় মডিউল আমদানি করা
const { google } = require('googleapis');
const fs = require('fs');

// credentials.json থেকে ক্রেডেনশিয়াল লোড করা
const CREDENTIALS_PATH = './credentials.json';
const credentials = require(CREDENTIALS_PATH);

// OAuth ক্রেডেনশিয়ালস নির্ধারণ করা
const { client_id, client_secret, redirect_uris } = credentials.web;
const CLIENT_ID = client_id;
const CLIENT_SECRET = client_secret;
const REDIRECT_URI = redirect_uris[0];

// OAuth2 ক্লায়েন্ট কনফিগার করা
const oAuth2Client = new google.auth.OAuth2(CLIENT_ID, CLIENT_SECRET, REDIRECT_URI);

// রিফ্রেশ টোকেন লোড করা যদি উপলব্ধ থাকে
if (credentials.web.refresh_token) {
  oAuth2Client.setCredentials({
    refresh_token: credentials.web.refresh_token
  });
}

// Google Drive API সেট আপ করা
const drive = google.drive({
  version: 'v3',
  auth: oAuth2Client
});

// OAuth URL পাওয়ার ফাংশন
const getAuthUrl = () => {
  return oAuth2Client.generateAuthUrl({
    access_type: 'offline', // রিফ্রেশ টোকেন নিশ্চিত করে
    scope: ['https://www.googleapis.com/auth/drive.file'] // Google Drive এর জন্য অনুমতি
  });
};

// OAuth Callback হ্যান্ডল করার ফাংশন
const handleAuthCallback = async (code) => {
  const { tokens } = await oAuth2Client.getToken(code); // কোড থেকে টোকেন পাওয়া
  oAuth2Client.setCredentials(tokens); // টোকেন সেট করা

  // টোকেন credentials.json এ সংরক্ষণ করা
  if (tokens.refresh_token) {
    credentials.web.refresh_token = tokens.refresh_token;
    fs.writeFileSync(CREDENTIALS_PATH, JSON.stringify(credentials, null, 2)); // ফাইলে সংরক্ষণ
  }

  return tokens; // টোকেন রিটার্ন করা
};

// এক্সপোর্ট করা ফাংশনগুলো
module.exports = { getAuthUrl, handleAuthCallback, oAuth2Client };
now index.js like below
// প্রয়োজনীয় মডিউল আমদানি করা
const express = require('express');
const fs = require('fs');
const { getAuthUrl, handleAuthCallback, oAuth2Client } = require('./middleware/googleAuth'); // গুগল OAuth ফাংশনগুলো আমদানি করা

const app = express(); // Express অ্যাপ তৈরি করা
const PORT = 3000; // পোর্ট নম্বর নির্ধারণ করা

// Authentication URL (for OAuth flow, needed once)
app.get('/auth', (req, res) => {
  // Authentication URL তৈরি এবং Redirect করা
  const authUrl = getAuthUrl();
  res.redirect(authUrl); // গুগল OAuth পেজে পাঠানো হচ্ছে
});

// OAuth2 callback route
app.get('/oauth2callback', async (req, res) => {
  const code = req.query.code; // কোড কোয়েরি থেকে বের করা
  if (!code) {
    res.status(400).send('No code provided');
    return;
  }

  try {
    const tokens = await handleAuthCallback(code); // টোকেন গুলো হ্যান্ডল করা
    console.log('Tokens:', tokens);
    res.send('Authentication successful! You can now use the app.');
  } catch (error) {
    console.error('Error during OAuth callback:', error);
    res.status(500).send('Error during authentication');
  }
});

// সার্ভার চালু করা
app.listen(PORT, () => {
  console.log(`Server running on http://localhost:${PORT}`);
});
now create a middleware for googledrive upload /middleware/googleDriveUpload.js
// middleware/googleDriveUpload.js

const { google } = require('googleapis');
const stream = require('stream');
const { oAuth2Client } = require('./googleAuth'); // OAuth client

// Google Drive API setup
const drive = google.drive({
  version: 'v3',
  auth: oAuth2Client,
});

// Function to upload a single file to Google Drive
const uploadFileToGoogleDrive = async (file) => {
  const fileMetadata = {
    name: file.originalname, // File name as received
  };

  const media = {
    mimeType: file.mimetype, // File MIME type
    body: stream.Readable.from(file.buffer), // Convert buffer to stream
  };

  try {
    const response = await drive.files.create({
      resource: fileMetadata,
      media: media,
      fields: 'id',
    });

    const fileId = response.data.id;

    // Set file permissions to make it public
    await drive.permissions.create({
      fileId: fileId,
      requestBody: {
        role: 'reader',
        type: 'anyone',
      },
    });

    // Generate the public URL for the file
    const publicUrl = `https://drive.google.com/uc?id=${fileId}`;
    return publicUrl;
  } catch (error) {
    console.error('Error uploading file to Google Drive:', error);
    throw error;
  }
};

module.exports = { uploadFileToGoogleDrive };
import index.js
const { upload, uploadFileToGoogleDrive } = require('./middleware/googleDriveUpload'); // Importing both Multer and Google Drive upload function

// File upload route with field names
app.post('/upload', upload.fields([
  { name: 'profile-picture', maxCount: 1 },
  { name: 'big-picture', maxCount: 1 }
]), async (req, res) => {
  try {
    const fileResponses = {};

    // Check and upload profile picture
    if (req.files['profile-picture']) {
      const profilePicture = req.files['profile-picture'][0]; // Get the file
      const { publicUrl } = await uploadFileToGoogleDrive(profilePicture); // Upload to Google Drive
      fileResponses['profilePicture'] = publicUrl; // Store the public URL
    }

    // Check and upload big picture
    if (req.files['big-picture']) {
      const bigPicture = req.files['big-picture'][0]; // Get the file
      const { publicUrl } = await uploadFileToGoogleDrive(bigPicture); // Upload to Google Drive
      fileResponses['bigPicture'] = publicUrl; // Store the public URL
    }

    res.status(200).json(fileResponses); // Send the file URLs as the response
  } catch (error) {
    console.error('Error uploading to Google Drive:', error);
    res.status(500).send('Internal Server Error');
  }
});